Set up a Ubuntu based workstation | Step 1: OS Installation and Basic Settings
This article is the first tutorial of a series on how to set up a multi-purpose Ubuntu based workstation. It covers the steps to install Ubuntu 24.04 LTS *desktop* operating system, and a minimal set of utilities, together with basic configurations.
Ubuntu 24.04 LTS Installation
1. Download the OS image
Download the OS image from the [Ubuntu official site](https://ubuntu.com/) (the current latest update is Ubuntu 24.04.4). One can view the [release notes](https://discourse.ubuntu.com/t/ubuntu-24-04-lts-noble-numbat-release-notes/39890) for more information.
2. Create a bootable USB flash
Use `dd` command to create a bootable USB flash drive with the downloaded OS image:
# insert the USB flash to be used as OS installer
# identify the name of the USB flash recognized by the OS
> lsblk
# the example output might be:
# ----------------------------------------------------------------
# NAME        MAJ:MIN RM   SIZE RO TYPE MOUNTPOINT
# ...
# sdd           8:0    1   233G  0 disk
# |- sdd1       8:1    1   233G  0 part /media/madpang/KIOXIA
# ----------------------------------------------------------------
# unmount any mounted partitions of the USB flash
> sudo umount /dev/sdd1
# write the Ubuntu installation ISO to the USB flash
> sudo dd if=~/Downloads/ubuntu-24.04.4-desktop-amd64.iso of=/dev/sdd bs=4M status=progress
And there you go---yes, you do not need any third-party tools to create a bootable USB drive. Note, this process is also applicable to macOS, just remember that `diskutil` is your friend when you need to manipulate the USB flash (see the extra notes section).
3. Install Ubuntu 24.04 LTS from the USB flash
Insert the USB flash drive into the target machine and boot from it. Depending on the manufacturer, you may need to press F2, F7, or F12 during startup to access the one-time boot menu---for **Dell machines**, it is **F12**---and select the USB flash drive as the boot device (see [fig:step0]). 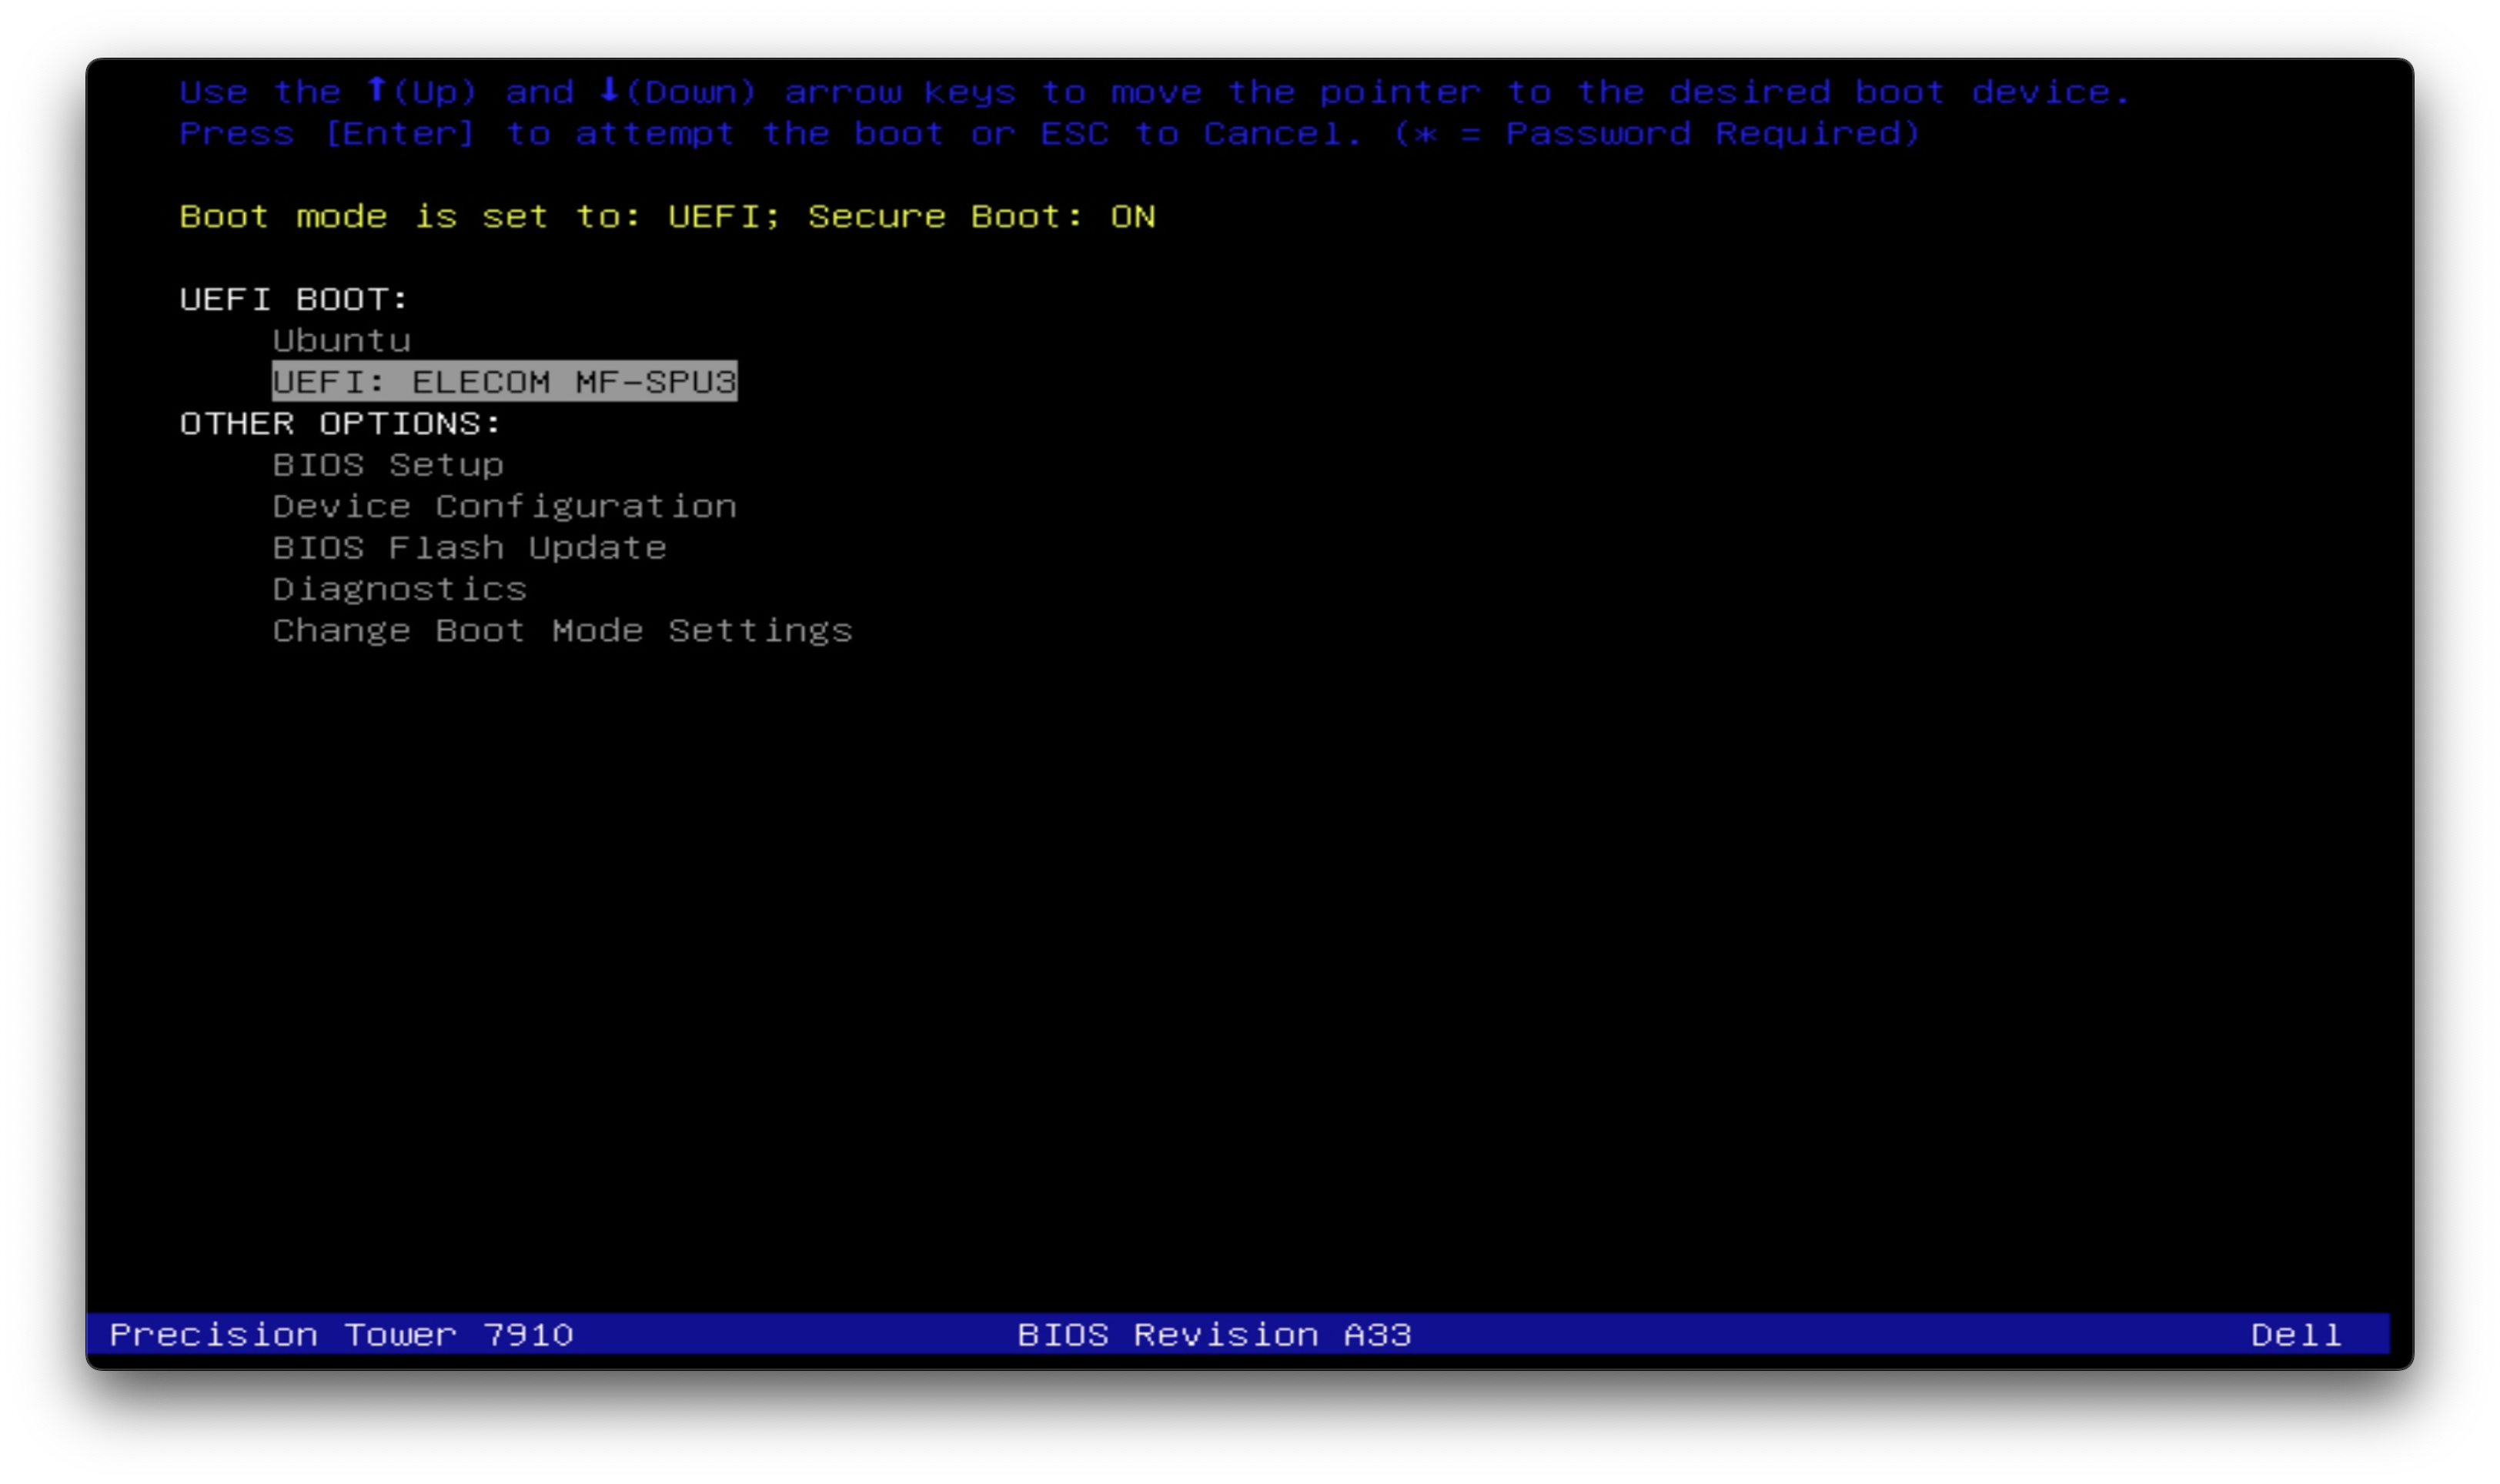
Then, choose "Try or Install Ubuntu" from GRUB menu (see [fig:step1]), and follow the on-screen instructions to complete the installation process. 
Basic Settings
1. Update the system
Use `apt` to keep the newly installed system up-to-date:
sudo apt update
sudo apt upgrade -y
2. Configure power setting
Go to *Settings* and set power mode to "Performance" to ensure the workstation run at full performance.
3. Create a Netplan bridge
A Netplan bridge behaves like a virtual switch. When you create a network bridge (e.g. `br0`), you’re effectively creating a software Ethernet switch on the machine, which is useful for virtualization. The bridge has one “uplink” interface (your physical NIC, e.g. `enp0s31f6`). Each virtual machine (VM) on the host gets a virtual NIC (vNIC) that connects to that switch as if it were plugged into a physical network switch. And all VMs attached to `br0` behave as independent devices on the LAN. Each can get its own IP from DHCP (or static), and they can talk to each other or to the outside world. A graphical illustration of the network topology is shown below:
                   +----------------------+
                   |      Physical LAN    |
                   +----------+-----------+
                              |
                         [enp0s31f6]
                              |
                   +----------+-----------+
                   |         br0          | ← acts like a switch
                   +----------+-----------+
                              | \
                              |  \
                      VM1 (vnet0) VM2 (vnet1)
To create a Netplan bridge, first identify the name of the physical NIC:
> ip -br link
lo               UNKNOWN        00:00:00:00:00:00 <LOOPBACK,UP,LOWER_UP>
enp0s31f6        UP             4c:d7:17:98:fe:52 <BROADCAST,MULTICAST,UP,LOWER_UP>
virbr0           DOWN           52:54:00:3c:d3:91 <NO-CARRIER,BROADCAST,MULTICAST,UP>
Then, create a configuration file with `sudo nano /etc/netplan/01-netcfg.yaml`, and add the following content to it:
network:
  version: 2
  ethernets:
    enp0s31f6: {}   # physical NIC (no IP)
  bridges:
    br0:
      interfaces: [enp0s31f6]
      dhcp4: true
      dhcp6: false
      parameters:
        stp: false
        forward-delay: 0
Apply the configuration with `sudo netplan apply`. Note, this command may change the IP address of the workstation, that’s why it is better to do this step on-site. After the setup, your network stack may look like:
Internet/router
     │
   [enp0s31f6]  <- now enslaved (no IP)
     │
   [br0]        <- gets the host's IP via DHCP (or static)
     |- Host (has IP on br0)
     |- VM1 (vnet0)
     |- VM2 (vnet1)
4. Install SSH server
Usually one need to maintain the workstation remotely through CLI, use the following commands to install and start OpenSSH server:
sudo apt install -y openssh-server
sudo systemctl enable ssh
sudo systemctl start ssh
# one can check the status by
# `sudo systemctl status ssh`
Use `hostname -I` to get the IP address of the workstation. Then, all subsequent configurations can be done through remote SSH connection.
Extra Notes
Choosing between desktop and server edition for a workstation
Even if the machine will provide “server-like” services (SSH, file sharing, containers, job runners) for a small team, **Ubuntu Desktop** is often the more practical baseline for a workstation: better out-of-the-box hardware support (GPU/Wi-Fi/Bluetooth), easier audio and display handling, and fewer embarrassments around day-to-day interactive usage.
However, if you are indeed determined for the server edition, follow the [instruction](https://ubuntu.com/tutorials/install-ubuntu-server#3-boot-from-install-media).
Tips of OS installation on a headless machine
When working with a headless machine---not yet has an OS installed---the initial hurdle is how to handle the interactive installation process. A keyboard is portable and is enough for the input, but a monitor is not. Although there are many sort of portable monitors available, but still not convenient---many of them requires additional power supply, while some of them support USB-C video/power delivery but the server side may not support it. I find a better solution is to use a minimal capture card---an integrated device that accepts HDMI signal output from the target machine's graphic port and delivers to the maintenance machine (you will usually want to carry your own laptop) via USB connection---for example, I use such a device from [UGREEN]. The minimal capture card may not be powerful enough for long-term use due to thermal issue, but it fits this work perfectly.
Prepare the installer on macOS
You can prepare the bootable USB flash drive on macOS. Use `diskutil` instead of `lsblk` to identify the name of the USB flash drive.
> diskutil list
# the example output might be:
/dev/disk0 (internal, physical):
   #:                       TYPE NAME                    SIZE       IDENTIFIER
   0:      GUID_partition_scheme                        *500.3 GB   disk0
   1:                        EFI EFI                     314.6 MB   disk0s1
   2:                 Apple_APFS Container disk1         500.0 GB   disk0s2

/dev/disk1 (synthesized):
   #:                       TYPE NAME                    SIZE       IDENTIFIER
   0:      APFS Container Scheme -                      +500.0 GB   disk1
                                 Physical Store disk0s2
   1:                APFS Volume Macintosh HD            15.0 GB    disk1s1
   2:                APFS Volume Macintosh HD - Data     400.0 GB   disk1s2
   ...

/dev/disk4 (external, physical):
   #:                       TYPE NAME                    SIZE       IDENTIFIER
   0:      GUID_partition_scheme                        *31.0 GB    disk4
   1:                        EFI EFI                     209.7 MB   disk4s1
   2:                  Apple_HFS Install macOS Catalina  30.7 GB    disk4s2
Then unmount the USB drive:
> diskutil unmountDisk /dev/disk4
Unmount of all volumes on disk4 was successful
Next, use `dd` to write the Ubuntu installation ISO to the USB flash drive:
> sudo dd if=~/Downloads/ubuntu-24.04.4-desktop-amd64.iso of=/dev/disk4 bs=4M status=progress
Finally, eject the USB drive:
> diskutil eject /dev/disk4
Disk /dev/disk4 ejected
You're done! The USB is now a bootable Ubuntu installer.